Tuesday, September 3, 2013

ELBs for Three


I have a lot of bento boxes now. A lot. So many! But my very favorite? The one I usually reach for first, the one most versatile and easy to use for all of the ages I pack for?

Easy Lunchboxes.

I love these things! They are hands down our favorites.

What I love about Easy Lunchboxes:

* Easy to use. They are aptly named! The open layout and three section design make them super easy to pack lunch in. The sections are big, but not too big ~ just the right size! Also, the lids pop right on and are simple enough to remove that even Beaker can manage them without help.

* Great size. I use them for all of my kids, including the four year old, and also for the grown ups. It's easy to adjust the amount of food packed for different appetites. They are big enough for larger appetites, but small enough to not be bulky or make you feel like you need to fill up a bunch of empty space.

* Fantastic company. The customer service is stellar, and the owner is a wonderful, classy lady whom I have had the great luck of getting to know a bit. I have a soft spot for owner run businesses, and this one is a great example of how awesome they can be.

* Excellent price. At only $13.95 for a set of four, the price is affordable for almost any budget. And free shipping with orders over $25 if purchased on Amazon!

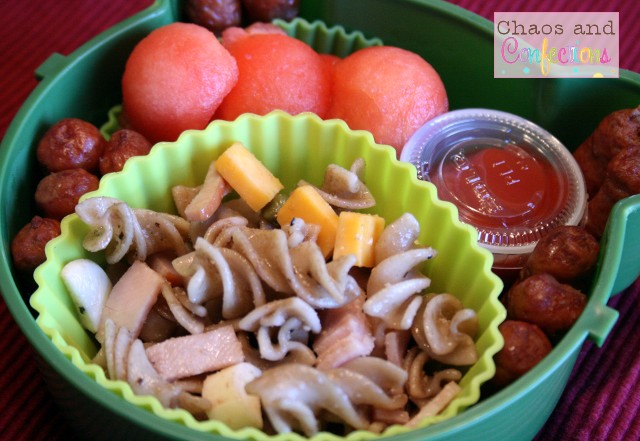
It's easy to see why these are my favorites! They aren't made to be leakproof, but packing things like applesauce or yogurt is super simple, just by putting a piece of Press N Seal over the section or packing the liquid-y food into a Mini Dipper or other small lidded container inside the ELB. 

They're also way easier to eat from than a bunch of small individual containers or baggies. The shape makes them into a perfect little tray for balancing on a lap, if necessary. 


Beaker and Princess loved the ease of use when they had a picnic lunch while at a parade over the summer. They were able to sit comfortably inside a wagon watching the floats and horses and bands march past, with lunches easily resting on laps and everything easily accessible. Can't do that with a bunch of fiddly little baggies! 


Princess had strawberries and cucumbers from the garden, pretzels, and grilled chicken with barbecue sauce for dipping.


Beaker took garden strawberries and cucumbers, carrot sticks, corn cereal, and chicken with ketchup for dipping.


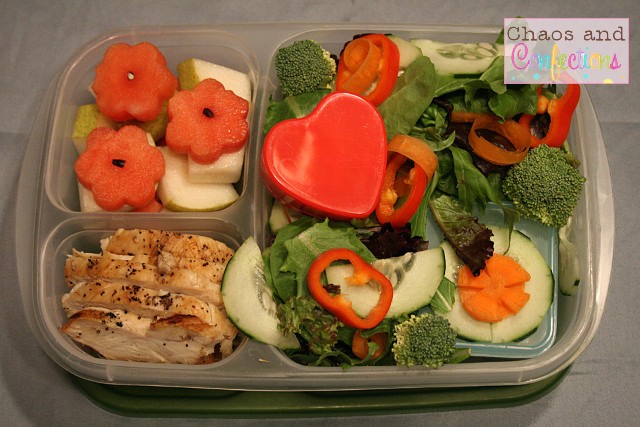
And for me, a grilled chicken Caesar salad. The lettuce, cucumbers, and strawberries all came from my garden. I love my garden!


Affiliate links to products used:


Wednesday, August 28, 2013

Carnitas Salad Lunch

Yum! Around here, carnitas is a favorite dinner. And it makes excellent lunch leftovers! To make the carnitas, I use a recipe similar to this one, except for mine I skip the garlic (since Beaker is allergic to garlic) and use my onion powder instead, and my own homemade broth. And I add a generous pinch of black pepper and ground red pepper for a little spice. The results are delicious, and SO easy. I just have to drop the meat in the crock pot with the spices and broth in the morning and by evening we have a delicious dinner, almost ready to go. It is also really good with a beef roast instead of pork.

Another super easy way is to just dump the meat in the crock pot and cover it with a good coating of ground black and red pepper, cumin, coriander, a dash of cayenne, and a sprinkle of onion powder. No liquid necessary, just let it stew in its own juices all day. Then pull the meat out and shred it at the end of the day. Done! This method is fantastic with beef or chicken.

For dinner, I like to serve the shredded meat with cilantro, diced onions, lime, shredded cabbage, sour cream and guacamole, and black beans, with lightly softened corn tortillas. SO yummy!


For lunches, the leftovers make a great salad!


This is just shredded cabbage with carnitas on top. A few halved cherry tomatoes decorate the corners.


On the side is a cup of salsa and some seven layer bean dip, with a tasty fruit salad. The container lid fits pretty flush, but to be extra certain that the bean dip stayed where it's supposed to I dropped a couple of silicone baran pieces on top. I also included a smaller container full of crispy tortilla chips for crunch.

Delicioso!


Affiliate links for products used:


Friday, August 23, 2013

Mini Sausages for the Lunchy Win

Recently my younger three kids have become somewhat obsessed with these little mini sausages. They've always been a favorite, but lately it's what they are requesting every day for lunch! The sausages are free of all of Beaker's allergens, but not terribly healthy, so I put some limits on them and let the kids have them one or two days per week. The kids like to eat them cold, which makes them pretty nice to pack for when we have to go places or for school. Here are some of their recent mini sausage lunches:


A handful of popcorn and chocolate chips for dessert, with pasta salad, grapes, watermelon, and mini sausages with ranch for dipping.


This one has garlic-free, gluten-free pasta salad for Beaker, with watermelon balls and mini sausages with ketchup.


He also has halved grapes, sunflower seeds, mini allergy safe chocolate chips, and carrot sticks.


In this one, the mini sausages come with BBQ sauce for dipping, and carrot sticks with cheesey ranch sauce. There is also watermelon pieces with grape halves, popcorn and chocolate chips.


On the side is a small green salad and a serving of Italian pasta salad.


This at-home lunch has mini sausages with ketchup for dipping, strawberries with yogurt for dipping, a handful of carrot sticks, and an allergen-free brownie bite for dessert.


We love these little sectioned plates. They are perfect for serving a preschooler! The different sections keep his food separated and help with portioning sizes.


Affiliate links to products used:

Thursday, August 22, 2013

Fancy Salads

Alternately titled: Why I Love Gardening!

A vegetable garden can be an investment, both of time and of money. But the rewards are delicious! In high summer I can plan lunch and dinner by walking out into my backyard and grabbing a handful of this, a few of those, a bowl full of that... and voila, a great meal, just add protein!

And one of the best summer lunches is a simple (or fancy!) salad, full of fresh veggies and other tasty toppings. Here are a few of the yummy salads I have packed for lunches on the go this summer!


This salad is one of my favorites. It's a simple pear and gorgonzola with pear vinaigrette on the side. Just mixed greens, chunks of pear, and a handful of gorgonzola cheese crumbles. Yum!


On the side I have a handful of mixed berries and a scoop of yogurt with gluten free chocolate granola sprinkled on top.


For this salad, I started with a base of fresh greens from the garden. I added homegrown cherry tomatoes and a few sliced mushrooms from the store. A sprinkle of shredded cheese and some smoked pepper salmon finish off this delicious salad. There is also dressing on the side, and some berries and chocolate for later.


Smoked salmon salads are rapidly becoming the Dude's favorites!


This salad is a very simple garden salad. It's just mixed greens with cubed carrots, sliced cucumbers, and bits of diced cheese. I put the dressing on the side to keep the greens from getting soggy. Cut pears are a nice crunchy sweet dessert with no fat and few calories.


A pretty turkey rose with crunchy gluten-free crackers are tucked up to the side of the salad. The turkey and crackers were added to the salad before eating, to keep the crackers from getting soggy and the turkey from making the lettuce brown too fast.


This last salad could be called "clean out the crisper salad". I grabbed random veggies out of the fridge that needed to be eaten and tossed them all in a salad. There is broccoli, cucumbers, sliced pepper rings, carrot curls, mixed greens, and some zucchini strips all tucked in there. I also put a side of dressing and a heart full of sunflower seeds and small crackers for a little crunch. There is sliced grilled chicken for protein, and up in the corner are some pear chunks and watermelon flowers for dessert.


Affiliate links for products used:


Wednesday, August 21, 2013

Allergy Safe S'Mores Crispy Treats


Feeding a kid with food allergies can sometimes be a challenge. Finding safe desserts is a search more difficult than the quest for the Holy Grail! There are plenty of delicious gluten-free options available, but almost all of the ones I have found so far have either soy, nuts, egg, or dairy... or all of the above. So for Beaker to have a sweet treat it pretty much has to be homemade.

A few weeks back, G-man had some friends over. For dinner, we put up a fire in the backyard fire pit and let them roast hot dogs. And what follows roasted hot dogs better than S'Mores? Not much! So I picked up graham crackers and chocolate and marshmallows and let the boys roast them up. Delicious!

Except Beaker could only eat the marshmallows. Which is fine, he loves them... but he was clearly sad to miss out on the crunchy chocolatey gooey goodness that is S'Mores. I haven't been able to find a single brand of graham cracker that is free of all of his allergens, and no chocolate bars either. Mini chocolate chips are excellent, but they don't work so well for smushing on a cracker with a hot mallow. I knew there had to be a way to make a Beaker-safe version of this delicious camp classic, but how? I turned it over in my head for a little while, then hit the kitchen. And this is what I came up with!

Allergy Safe S'Mores Crispy Treats Recipe


2 cups rice cereal squares
2 cups corn cereal squares
4 cups crisp rice cereal
40 regular marshmallows
3 tablespoons coconut oil
1 - 1 1/2 cups allergy safe chocolate chips

Pre-coat a large baking dish or muffin tins lightly with coconut oil or cooking spray. Warm coconut oil in a large pan over low heat. Add marshmallows and heat until melted, stirring occasionally. Turn off heat and add cereal, tossing thoroughly to coat. Allow to cool for a few minutes (but not too long) and then add the chocolate chips. Mix in well.

Spread mixture over baking pan or scoop small spoonfuls into muffin tin. Allow to cool until set. Store in tightly covered container in the refrigerator.

Notes: The ingredients I used are safe for my son's allergies. They are free of gluten, soy, nuts, eggs, and dairy. When making food for someone with allergies be sure to take their specific allergies in to consideration. If you don't have to worry about allergies at all, you can substitute regular chocolate chips. This recipe could also be made vegan very easily just by using vegan marshmallows, but some alterations to the amount of marshmallow used might be necessary. For the pan, I like to use a mini muffin tin to make bite sized treats, just the right size for little hands.


Beaker was my little taste tester for this recipe.


He heartily approves!

To get a wider range of opinions, I took a big platter of them to a get together with friends. They were a big hit! I came home with a completely empty platter that had been nearly licked clean. The Dude said that if he hadn't seen them being made he never would have guessed they were made with allergy safe chocolate. A high compliment from him!


They also work great as a small sweet treat packed in lunches. 


For this lunch I packed Beaker some mini sausages with ketchup, GF pasta caprese salad, a peeled and segmented Cutie orange, and a bite-sized S'Mores Crispy Treat.


The caprese salad is made with gluten-free brown rice pasta, a bit of diced sweet onion, halved cherry tomatoes and shredded basil from the garden, and bits of mozzarella cheese. It also has a dash of pepper, and some olive oil and balsamic vinegar. It's a nice, light summery salad, and Beaker loves it.


Affiliate links to products used:


Read Me

Blogging tips